The Best Ice Cream Mold
Our Review Process
Don't Waste Your Money is focused on helping you make the best purchasing decision. Our team of experts spends hundreds of hours analyzing, testing, and researching products so you don't have to. Learn more.
Our Picks For The Top Ice Cream Molds
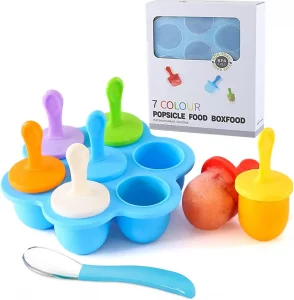
- 1. JBYAMUS Children’s Easy Release Ice Cream Mold
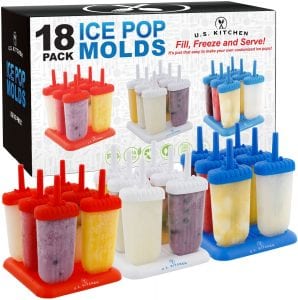
- 2. U.S. Kitchen Supply BPA-Free Reusable Ice Cream Mold, 18-Pack
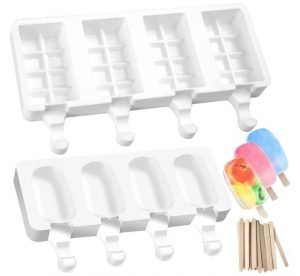
- 3. icekingclub Silicone BPA Free Ice Cream Mold, 2-Pack
- 4. LOVEINUSA Square Ice Cream Mold, 2-Pack
- 5. PLORIO Silicone Ice Cream Mold, 3-Pack
- 6. Silikomart Non-Toxic Classic Ice Cream Mold, 2-Pack
- 7. Ouddy Flexible Odorless Ice Cream Mold, 2-Pack
- 8. Ozera Reusable Popsicle & Ice Cream Mold
- 9. Kootek Homemade Reusable Ice Cream Mold, 2-Pack
The reusable popsicle sticks in this ice cream mold are designed for little hands to hold. They come in a variety of bright colors and produce frozen treats that are round in shape. The mold is made from an easy-release nonstick silicone that free of any harmful toxins.
Best for Tiny HandsThis ice cream mold is temperature safe from -40 degrees to 446 degrees Fahrenheit.
Since this ice cream mold set produces 18 large ice pops, it's ideal for large families or summer parties. The molds come in three different colors and have a 4-ounce capacity for each popsicle. You can fill the molds with everything from yogurt to freshly squeezed juice to coconut milk ice cream.
Oversized OptionThis eco-friendly ice cream mold set is dishwasher safe.
Create delicious treats for your little ones using these ice cream molds. Each of the two molds is made from a BPA-free silicone that is nonstick, so your desserts will pop out with ease. As an added bonus, the molds come with 100 popsicle sticks to get you started.
Budget-Friendly PickYou'll love the affordable price tag on this reliable ice cream mold set.
Buying Guide
Few things can be as refreshing on a hot summer day as a good popsicle or ice cream. But packaged frozen treats can be packed with artificial ingredients and sugar. Making your own ice pops opens up an endless array of ingredient combinations, from fruit-juice popsicles to ice cream swirled with your favorite flavors. As a bonus, you’ll save money.
To make your own popsicles, you’ll just need a mold. Pour the ingredients in, freeze them and a little while later, you’ll have a delicious treat. The length of time you’ll need to leave your creation in the freezer depends on the ingredients themselves. You can find plenty of great recipes online.
As you start looking around for molds, you’ll start to notice there are many shapes and sizes. You can find smaller options that make only a few smaller popsicles at a time. One benefit of that type is that it won’t take up much room in the freezer. But there are other molds that make larger popsicles or even have fun shapes and sizes — these are often great options for making ice cream pops
As with any food container, cleanup will be an issue. Most popsicle molds will be fairly easy to clean, but some can even be placed on the top rack of the dishwasher. If this convenience is worth it, make that a top priority while you’re shopping.
What to Look For
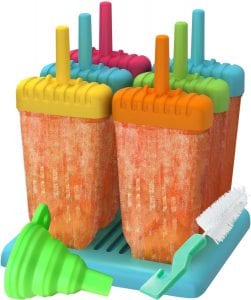
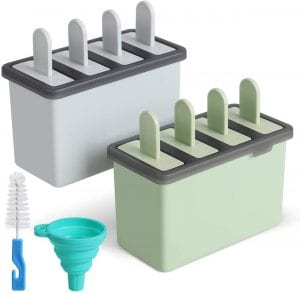
- Getting the ingredients into your mold can be challenging, particularly if it has a narrow opening. Some ice cream molds come with a funnel that makes it easy to pour items in. They might even fold up for easy storage when you aren’t using them.
- You can find ice cream molds that make popsicles in characters, animals and shapes. For the younger children in your life, that can add even more fun to the process.
- If your mold doesn’t have a built-in handle, you’ll need to invest in popsicle sticks. Some molds come with a set of sticks to get you started, but you’ll need to purchase some extras for when those run out.
- If your mold makes 10 or more popsicles, you’ll need a way to store them if your children won’t be eating them all immediately. If you’re only storing them for a short time, an airtight container will do. But for longer storage, you’ll need to wrap each popsicle individually in a freezer bag.
- Inserting the sticks can be tricky. If you slide them in too soon, they’ll tilt and turn out crooked. If you wait too long, though, you won’t be able to insert them. For best results, pour the ingredients and place the mold in the freezer for 40 minutes, then insert the sticks. Make sure to set a timer to keep yourself from forgetting to put the sticks in.
More to Explore
Many people don’t know that popsicles were created by an 11-year-old San Francisco boy. In 1905, Frank Epperson used a wooden spoon to mix his drink of soda powder and water. He accidentally left the drink on the front porch on a cold night and woke the next morning to find it frozen. As he licked the frozen treat from the stick, he decided to call his tasty new dessert an Epsicle. He began selling them for a nickel each, eventually filing for a patent for his Epsicle in 1923. By then, he had children of his own, and the story goes that they inspired him to change the name since they called them “Pop’s sicles.”

