The Best Waxing Kit
Our Review Process
Don't Waste Your Money is focused on helping you make the best purchasing decision. Our team of experts spends hundreds of hours analyzing, testing, and researching products so you don't have to. Learn more.
Our Picks For The Top Waxing Kits
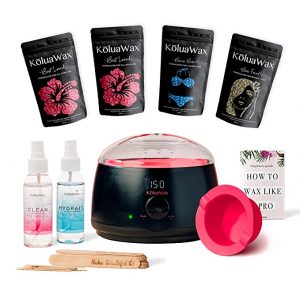
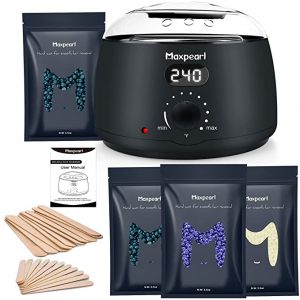
Featuring hard waxes labeled for specific uses, this kit has everything you need to get started. The convenient warmer comes in both black and pink. You get a few bottles of oils and some spatulas too.
Good for Getting StartedSince it includes everything you need and an instructional guide, this kit allows you to get started with at-home waxing quickly.
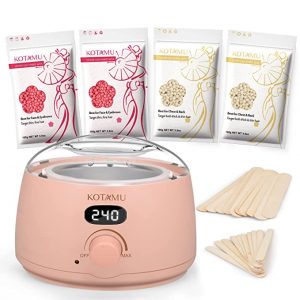
This kit provides four bags of wax beads including two bags each for fine and coarse hair. The pink warmer is straightforward and reliable to use. You also get spatulas in two sizes.
Offers VarietyIf you want flexibility, this kit features two specific wax types targeting either fine or coarse hair.
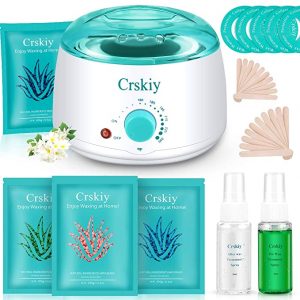
Containing 32 items, this kit has a fast and easy-to-use warmer along with four different scents for the wax beads. You get special oils for prepping and soothing the skin along with multiple applicators and protective rings for the warmer.
Plenty of ContentsThis convenient all-inclusive kit includes everything for before, during and after your wax.
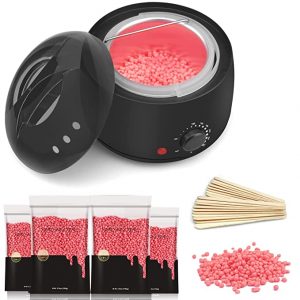
This kit gives you a warmer that heats up quickly and has safety features. The gentle hard wax beads have a pleasant rose scent, and you get four bags to last you a while. The kit also includes two sizes of spatulas.
Pleasant ScentConsider this wax kit if you like the scent of roses and prefer a more comfortable waxing experience.
Buying Guide
If you’d like long-lasting results that shaving can’t provide, a waxing kit offers the benefit of convenient hair removal and can save you on trips to the salon. Even if you’ve never waxed before, you can find safe and easy-to-use kits that are aimed at beginners and include clear instructions. You also have options if you’d like to use a waxing experience with less of a mess to clean up.
One option is a waxing kit that includes a cold wax that doesn’t require a special warmer and can feel more comfortable to use. Ideal for areas with finer hair, cold wax requires the use of strips that you’ll press down and pull off the skin. Great for beginners, these kits involve ready-to-use wax strips that you can rub between your hands and apply without a big mess. You can easily cut the strips if you’re working on a small area like your eyebrows or upper lip.
As another option, wax kits with hot wax require more preparation and skill to use, but they’re ideal for removing coarse hair and dealing with large areas. The wax can come in a gel, disc or bead form, and you need to put it in a special warmer so it can get to the right temperature and consistency for use. You use a spatula to apply the wax directly to the target area. If the hot wax is soft, you’ll need to use a strip to pull it off, but other types of hot wax will harden so you won’t need the help of a strip.
Whether you choose a cold or hot waxing kit, pay attention to the contents so that you have all the items you need. For example, a hot waxing kit should include a warmer, sufficient starter wax, spatulas, strips (if soft wax) and ideally some accessories for prepping and soothing the skin. You should also look at the wax’s ingredients to check if they’re suitable for people with sensitive skin and don’t contain something you’ve had an allergic reaction to.
What to Look For
- Before you wax, you’ll ideally want the hair to have grown out to around a quarter of an inch. Otherwise, you can have trouble getting the wax to grab the hair to pull it out.
- You can typically expect your at-home wax results to last between four and six weeks. However, your hair growth speed may vary, and the area you waxed also plays a factor.
- If you have concerns over the waxing process hurting, consider putting on a numbing cream around a half hour beforehand. It also helps to make sure you don’t apply hot wax when it’s too warm since this can cause burns and more pain.
- It’s essential to prep your skin before you start using your waxing kit. You’ll want to thoroughly clean and exfoliate the area but avoid using any irritating creams and chemicals.
- Try waxing a small area of your skin as a test before you move forward with a larger area. This will help you identify potential allergies and sensitivities before they cause a bigger problem.
- You should apply the wax in the same direction as the hair grows, press down so the wax can grab the hairs, and then pull the hard wax or wax strip off in the opposite direction that the hair grows.
- After you finish waxing, try to apply a moisturizer to your dry skin since this has a soothing effect and can also help get rid of residue. Baby oil is a popular option. You can also try a cold compress and avoid wearing anything tight around the waxed area to feel more comfortable. Lastly, wait at least a few days before you exfoliate the area.
- Keep in mind that using an at-home waxing kit comes with risks. You should closely follow the instructions on the kit and avoid waxing the same skin area multiple times. In addition, if using hot wax, choose a warming setting that isn’t so hot that it could burn your skin. Lastly, be careful when using wax around sensitive areas.
More to Explore
Check out these interesting facts about waxing:
- Did you know that waxing originated in ancient Egypt? Women would use natural substances like sugar and honey to create the wax.
- Commercial waxing products date back to the 1930s in France. Waxing strips, however, only date back to the 1960s.
- There’s a common hair removal myth that shaving or waxing hair makes it thicker when it grows back in. While the thickness doesn’t actually change, you may notice your hair looks thinner after you’ve waxed than if you shaved. This is due to the hair being removed from the root versus just having the tip cut off.
